de
de el
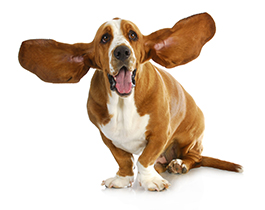
elEverything About Ear Infections In Dogs
It’s important to regularly clean your dog’s ears to ensure they remain clean and healthy. However, many people struggle to clean their dog’s ears, especially if they are anxious when people touch this sensitive area.
Therefore, it’s vital that your dog remains comfortable throughout the ear cleaning process to avoid causing them unnecessary stress. It’s a good idea to handle your dog’s ears from a young age, as they’ll be much more comfortable with you cleaning their ears.
Check out the below guide for all the info you need about dog’s ear infections!
Why Do You Need to Clean Your Dog’s Ears?
Just like people, a dog’s ear produces wax to protect their inner ear from things like dust, dirt, debris, moisture etc. However, if too much wax build ups without being cleaned, it may cause a painful ear infection – something any dog owner wants to avoid!
So, in most cases you should clean your dog’s ears once every few weeks, possibly more often if they are a breed with droopy ears.
How to Clean Your Dog’s Ears
Thankfully, cleaning your dog’s ears couldn’t be easier. You just need a few pieces of equipment, which is widely available at most pet stores or veterinary clinics.
Equipment
Before you clean your dog’s ears, make sure you have the following equipment:
- Clean Towel
- Cotton Wool Pads
- Dog-Specific Ear Cleaner
- Dog Handler (Only needed if your dog isn’t used to the ear cleaning process)
Make sure you avoid buying cotton buds to clean your dog’s ears! Cotton buds can go too deep into the ear canal, potentially damaging their ear.
Cleaning Your Dog’s Ears
Start by getting your dog in a comfortable position, then lift one ear and take a closer look inside of the ear canal.
Before you clean you want to check the ear for signs of an infection, such as redness, discharge, or an unpleasant odour. A small amount of brownish wax is healthy, but lots of wax with puss and nasty smells are sign of an ear infection.
Begin the cleaning process by gently wiping the ear with a damp cotton pad.
After cleaning outside of the ear, use the ear cleaning solution to clean inside of their ear canal – avoid going too deep into the canal though!
Now gently massage around the base of the ear to help the cleanser pass through the ear canal.
Wipe the dog ear cleanser with a damp cloth and repeat the entire process on the other ear!
If your dog needs eardrops, make sure to apply them right after cleaning the ears. Doing so ensures the drops are absorbed into the ear rather than any excess wax build ups!
Checking Your Dog’s Earwax
If you’re unsure whether your dog’s ear has an infection or just needs a good clean, you can inspect their earwax for a better idea of the situation.
- Light Brown/Yellow: A small amount of light brown or yellow earwax is perfectly healthy for a dog. However, if the wax also smells unpleasant and the ear looks red/inflamed, it may be infected.
- Dark Brown/Black: Indicates a potential yeast or bacterial infection. Make sure to visit a vet if you spot this type of earwax!
- Green Wax: Usually a sign of a yeast infection, especially if accompanied by unpleasant smells.
- Red: Red wax may indicate blood in the ear, which could be caused by injuries, insect bites, or scratching. Make sure to visit a vet to determine the cause of red earwax!
- Grey: Grey wax is a sign of a yeast infection but may just caused by build ups of dirt and dust. Clean the wax away and if it returns the same colour, contact your vet.
About the Author

Related Products