de
de el
elA Complete Guide to Cleaning Your Dog’s Ears
Regularly cleaning your dog’s ear ensures that they remain healthy and infection-free. However, cleaning a dog’s ear may not be the easiest, especially if your pet gets stressed when you touch their ears.
So, it’s important to keep your dog calm and comfortable while cleaning their ears, otherwise they get stressed and anxious. Of course, it’s always a good idea to handle your dog’s ears when they’re young so they don’t mind you cleaning them.
The Importance of Cleaning Dog Ears
Earwax is an oily substance that accumulates inside dog ears, protecting it from things like dust, dirt, bacteria, and moisture. While a small amount of earwax is important for healthy ears, too much wax may indicate an infection.
So, by regularly cleaning your dog ears you can reduce the chance of a nasty infections! Moreover, regular cleaning lets you inspect their ears for signs of infection so you can act fast to address the problem.
The Best Way to Clean Dog Ears
Thankfully, cleaning your dog’s ears is quick and easy. You can buy all the equipment you need from a pet store or veterinary clinic, so make sure to have the following supplies for cleaning your dog’s ears:
- Clean Towel
- Cotton Wool Pads – Don’t use cotton buds as they can damage the ear canal!
- Dog-Specific Ear Cleaning Solution
- Dog Handler – Only needed if your dog hasn’t had their ears cleaned before or they’re very anxious
Step One
Before you do any cleaning, get your dog nice and comfortable. Once they’re comfortable, gently lift one ear, checking in and around the ear canal for signs of an infection.
Any of the following may be a sign of an ear infection:
- Redness
- Puss or Discharge
- Unpleasant Smells
Dark-Brown, Black, Green, or Grey Coloured Earwax
Step Two
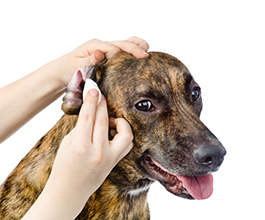
To start cleaning, gently wipe the inside of the dog’s ear using with a damp cotton pad.
Step Three
Apply the dog-specific ear cleaning solution inside of the ear canal. Make sure you don’t go too deep into the ear canal!
Step Four
Gently massage the base of the dog’s ear after applying the cleaning solution. This process helps the cleanser reach deep into the ear canal for maximum effect!
Step Five
Wipe the cleaner with a damp cloth, then repeat the above steps on the other ear.
Should your dog need eardrops for an infection, apply them after cleaning. Doing so ensures that the eardrops reach into the ear canal instead of being absorbed by earwax.
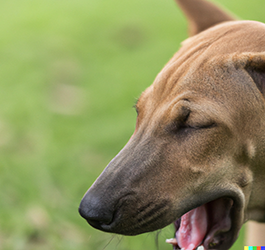
Signs of an Ear Infection
Before you start cleaning your dog’s ears, you want to check their earwax for signs of an infection. The colour of the wax usually indicates if there is an ear infection, so look out for the following types of earwax:
Light Brown or Yellow: This is the healthy colour for dog earwax! However, if it smells odd or has some redness, it could be an infection.
Dark Brown or Black: Darker coloured wax indicates a potential bacterial or yeast infection, so make sure to consult a vet.
Red: Usually a sign of blood in the earwax, which may be caused by an injury, insect bite, or from the dog scratching.
Green: Typically indicates a yeast infection, especially if the wax has a nasty odour.
Grey: Often a sign of a yeast infection, although could just be dust and dirt in the earwax. If grey wax persists after cleaning, check with your vet.
About the Author

Related Products